It’s hard to find one single guide out there that gives you all the information you need about Amazon product photography.
Also increasing competition is creating all sorts of new image possibilities on product listings. In this post we want to go over what the best sellers are doing on Amazon so you can apply it to your own business.
And we want to show you how to create incredible product images yourself if your budget is small.
Images create trust between you and your potential customer. So in the larger scheme of a complete Amazon SEO plan, product images play an important role in generating interest and increasing sales.
Table of Contents
Amazon Technical Image Requirements
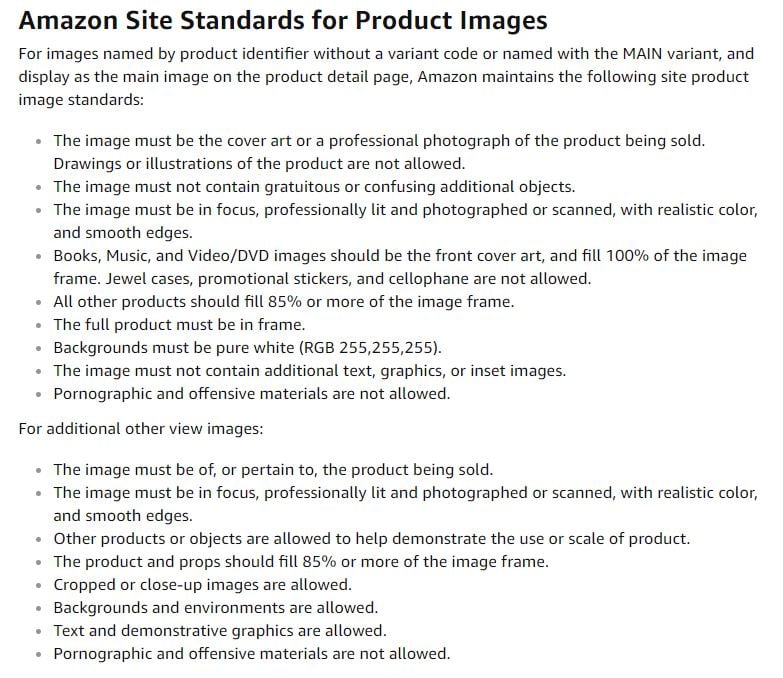
When you’re creating a product listing make sure that you follow these technical requirements with all of your images.
- 1000px by 1000px square image
- Use 85% of the frame
- Save it as a JPEG, TIFF, or GIF
- Save it as RGB color space
The technical requirements for the main product image are more specific. Here is a cheat sheet of the technical image requirements for the main image:
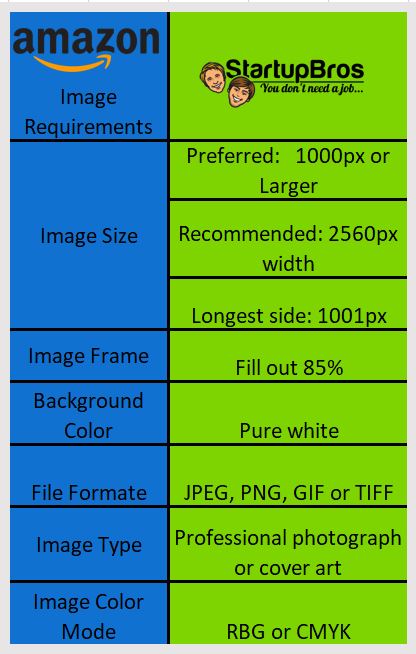
Understand, this is for the main image.
Your main image gives your customer a clear understanding of what your product looks like and needs to be free of any distractions.
That’s why the background has to be completely white and the product needs to take up 85% of the image.
Amazon wants the customer to be able to see the product clearly.
Another highlight to mention is that the main photo is required to be at least 1000px because it enables the zoom feature.
This wasn’t always required but since it enhances the buying experience Amazon now requires it on the main image.
File Name Requirements
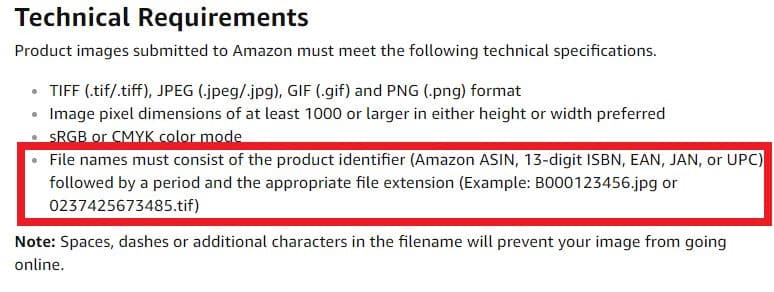
I want to highlight a very overlooked part of image SEO.
Amazon requires that you name the photo file either the Amazon ASIN, JAN, EAN, 13-digit ISBN or the UPC code you purchased.
For 99% of cases we would either use the Amazon ASIN or the 13 digit UPC Code.
Then you need to tell Amazon what kind of image file it is.
So you only have 4 options: PNG, JPEG, GIF, or TIFF.
For example: (File name: AmazonASIN.JPEG)
We shot a quick 30-second video on how to change the file name:
Amazon won’t accept the main product image without the proper file name.
Next:
Types of Product Listing Images
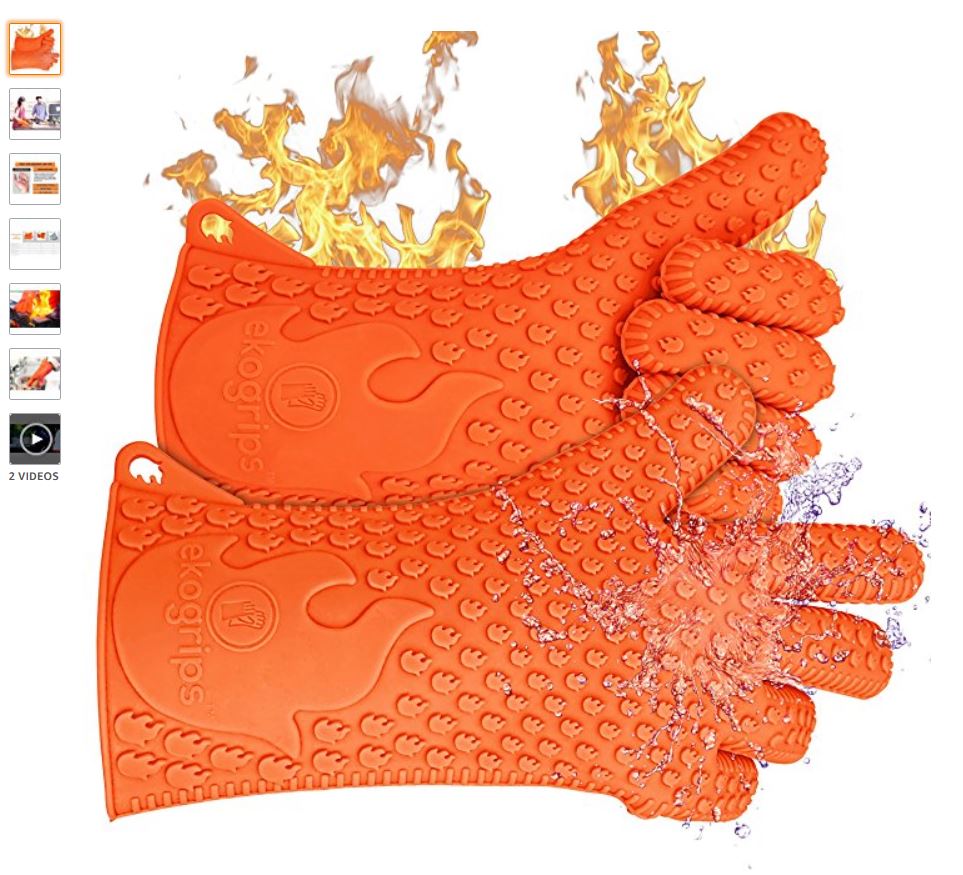
1. Parent SKU Main Image
The first photo your customer sees is the parent image. This is the image that appears in the search results when someone is looking for your product. Amazon wants to make sure you provide a great buying experience for your potential customer so they are very strict about the requirements for this first photo.
Child SKU Image
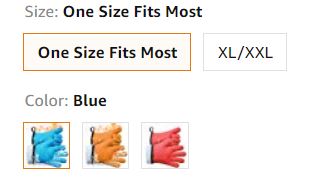
Also known as child variations. Child SKU images are necessary when your product comes in different sizes or colors. It’s most helpful when you offer multiple colors because the customer can see what each one will look like. You cannot sell child variations of your product without that specific variation image.
For the child SKU images and the alternate images, the only image requirement is to meet the minimum technical requirements.
Alternate Product Images
You can use all sorts of images for your remaining 7 images. Here are some examples of how you can use the other images to create more trust with the potential customer and generate more sales.
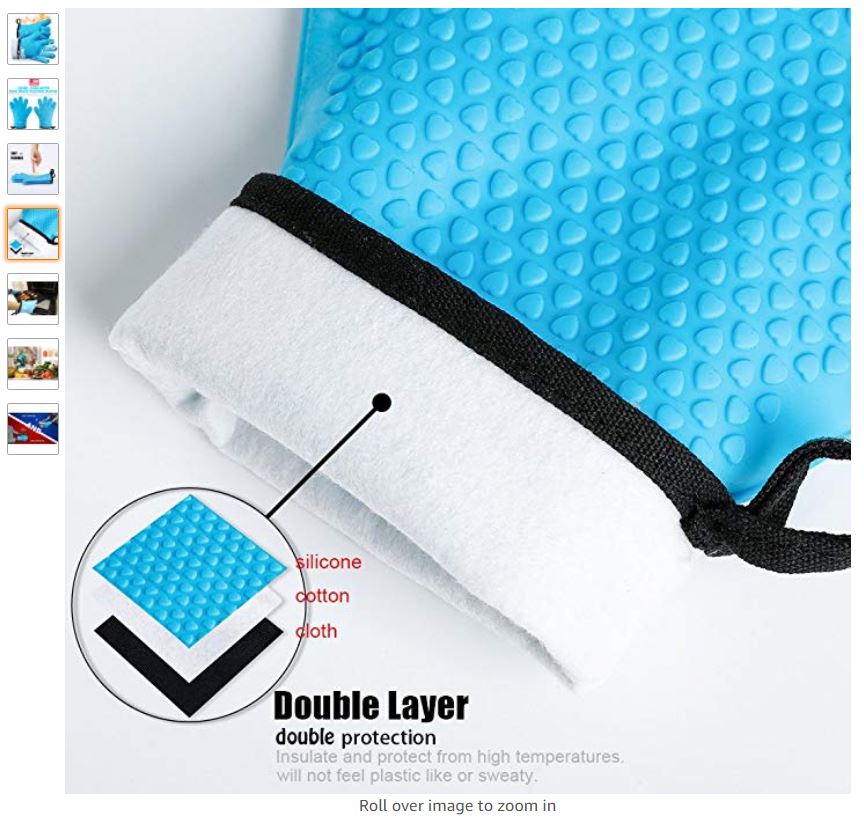
Product Benefit Highlight Image
What makes your product different than your competitors? It’s not as simple as placing your product for sale. You need to help your customer decide that your product helps solve their problem better than anything else. That’s why highlighting a benefit that can alleviate a pain point is important.

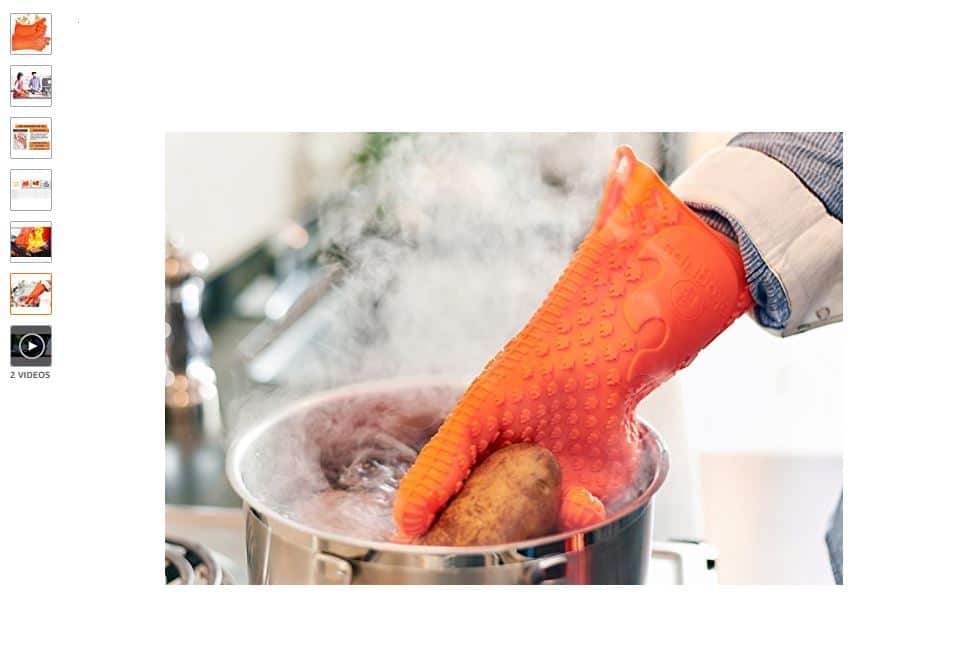
Product in Action Image
Customers want to see themselves using your product. Since there’s no physical store, there’s no way for the customer to try your product themselves. An image with the model using the glove shows the customer the utility of the product and makes them feel more confident about buying the product.
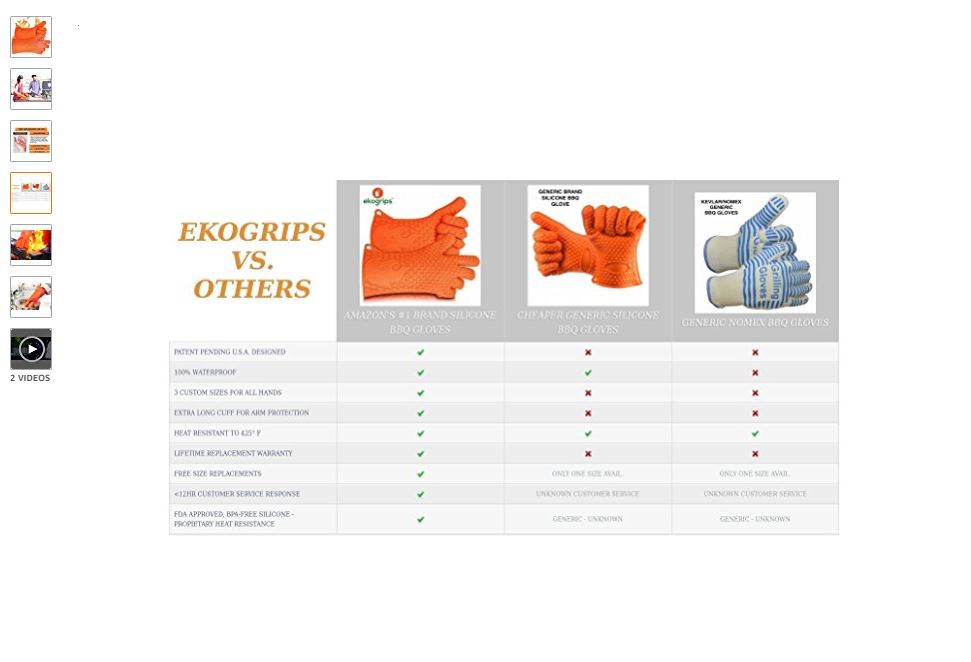
Competitor Analysis Image
A competitor analysis image is answering your customers questions before they get a chance to ask. As a seller you know the customer wants to shop around, find the best deal, and compare your product to others. Why wouldn’t you want to make those steps easier for your customer? It shows that you believe in your product and you’re willing to compare it with all the other competition.
Product Listing Videos
Once you start generating sales and register your brand with Amazon you qualify for enhanced brand content.
You’ll have the opportunity to highlight your product in more creative ways like video.
To see the power of video we have a 30 second clip of what a video on an Amazon product listing can look like!
Check it out below.
Now:
Before we get into services that help you with your product photography, we want to show you how to take these kinds of photos yourself.
Amazon DIY Product Photography
If you’re looking to sell on Amazon or create an online store, pictures are crucial. You’re not selling to robots in your product listings.
You’re selling to humans and they need to feel confident to buy your products, only great pictures put customers minds at ease.
So, i’m excited to discuss these things to you. So let’s gets started!
Digital Cameras
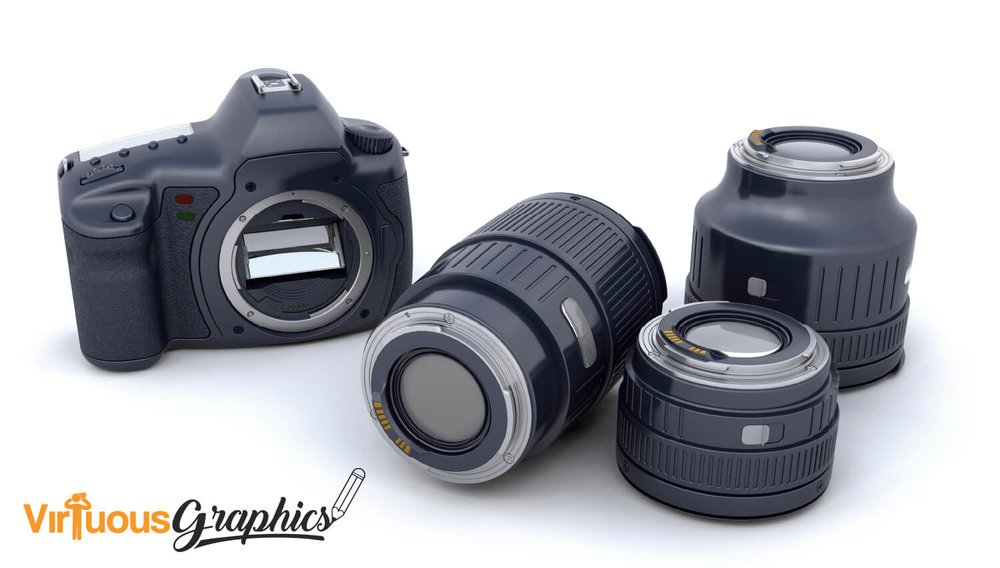
These cameras are the staple in today’s photography. If you already own one, you’re probably wondering if you need to upgrade or replace it. Or probably, you’re not sure about its features yet.
If so, let’s talk about them, starting with the 2 basic types.
Point and Shoot Camera
The first type of digital camera is the point and shoot. It has one lens; thus, it’s less expensive compared to the other type. Nonetheless, these cameras are good for DIY product photography. It creates amazing pictures with impressive focus to detail.
DSLR Camera
Digital SLRs are the second type of digital cameras. To get a close-up shot of your product, this should be your weapon of choice. You can customize it with a variety of lenses to allow you to take better quality shots up-close or from a distance. For steady framing, a tripod can be attached from its base.
We recommend something like this:
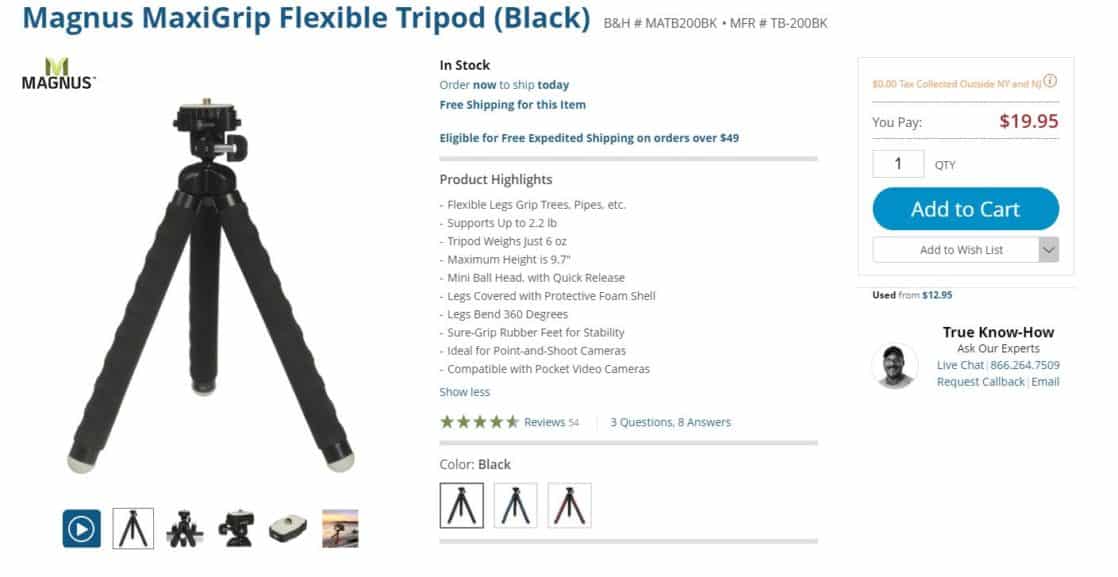
It’s small, affordable and the legs are flexible so you can capture virtually any angle you want.
Look:
Depth of Field
Focus is a crucial aspect in DIY product photography. If your camera has an auto focus feature, you need not worry about this; most modern cameras have this though.
But if you want to enhance focus, you might want to think about this focus-related element, which is known as Depth of Field (DOF).
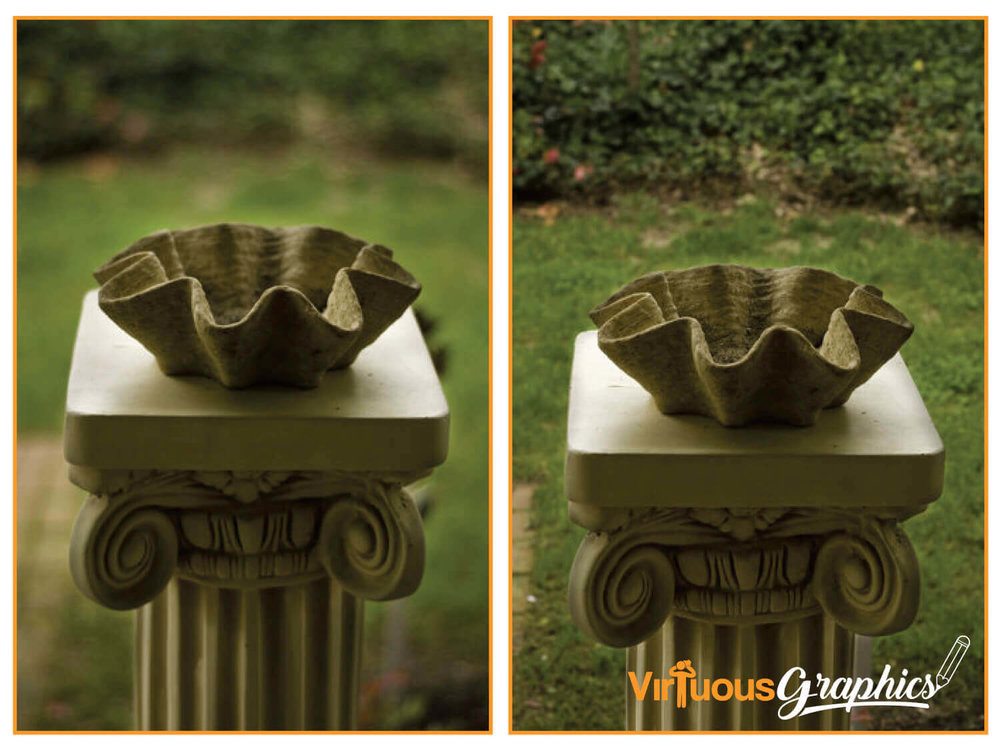
Both pictures above show the same object. But notice the one of the left; it shows a larger focus of the surrounding area of the subject compared to the photo on the right.
So what does having a larger DoF contribute to better-quality photos?
Having a larger depth of field allows potential buyers to have a more accurate, clearer view of the item on display. On the other hand, if you set it at shallow depth of field, the photo gives off an emotional, sort of romantic feel.
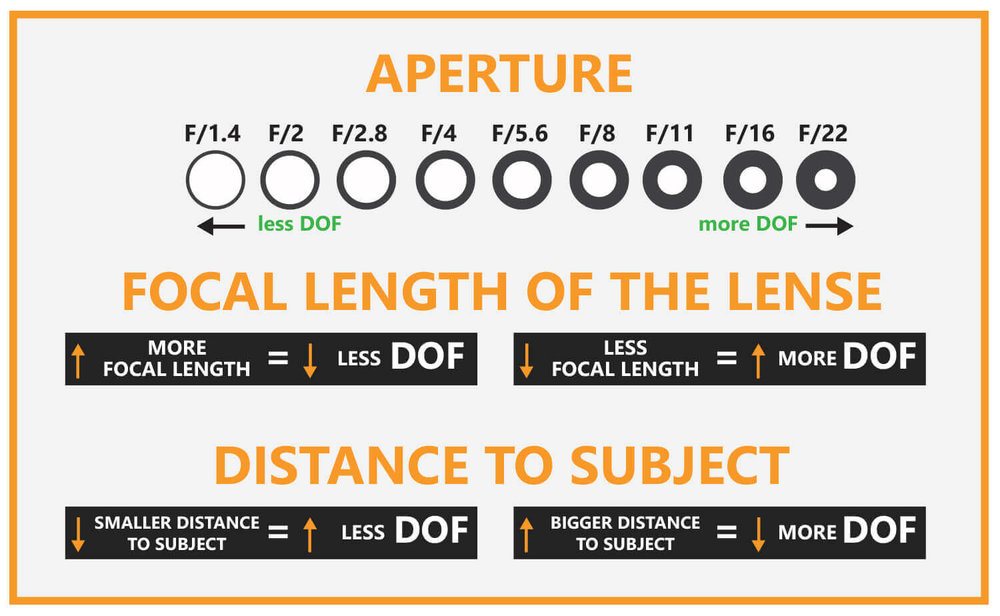
- To control this, locate your camera’s exposure controls. If you want a shallow DoF, adjust the settings to Aperture Mode, setting it to low numbers like 1.8 or 3.5.
- Shallow depth of focus is also known as selective focus. The subject that’s inside the square on the screen will be the only thing that’s going to be focused sharply and in detail.
- If you want to achieve a larger depth of field, set the Aperture Mode on your camera at 11 to 16.

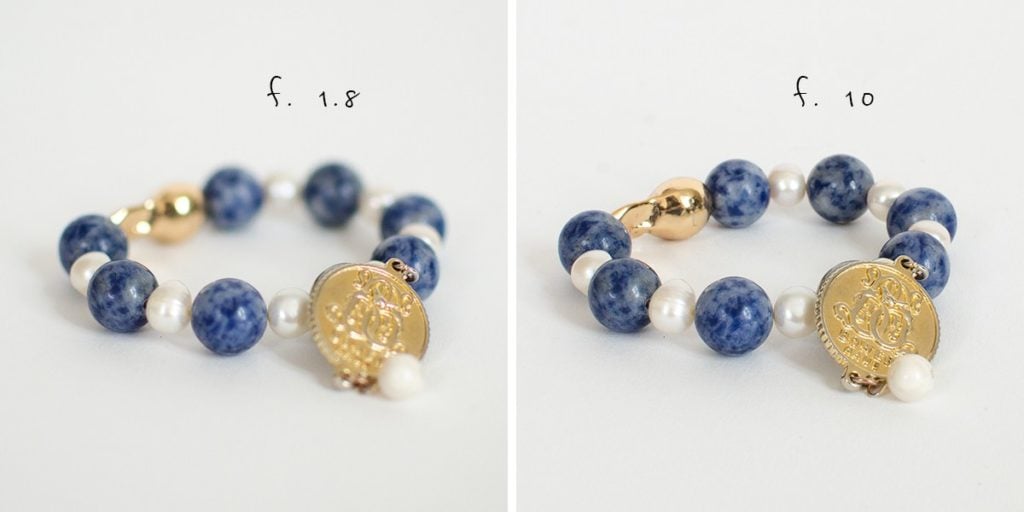
Remember:
- Low aperture settings = shallow DoF
- High aperture settings = larger or broad DoF
Lighting and Tent Equipment
Lighting is the most crucial element in your product photography. Incidentally it may also be one of the intimidating concepts.
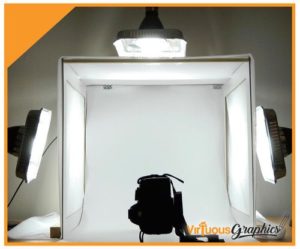
To achieve the perfect lighting, you need to set up a light on the right and left sides; having lights on the top or back area is optional.When choosing your lighting, you could use small, easy-to-setup, and flexible-for-any-use equipment.
You’ll also need to consider getting a light tent designed with translucent sides for a virtually shadow-less setting. This tent should also be established against a solid background as this helps diffuse any light coming from other sources.
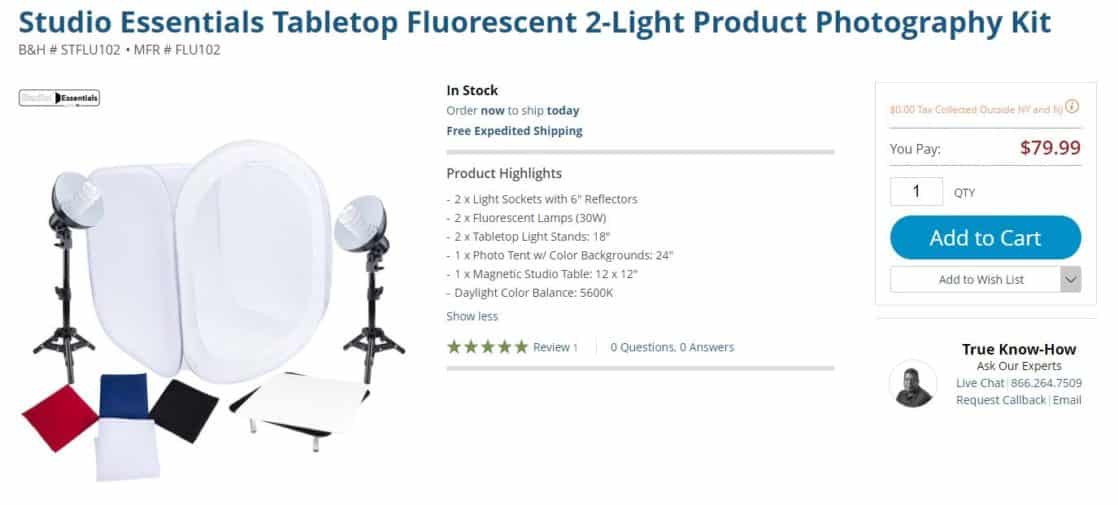
If you want we also went and found a cool kit to use if you want to make sure you have everything you need!
DIY Product Photography Equipment to Consider Includes:
- 2 x Light Sockets with 6″ Reflectors
- 2 x Fluorescent Lamps (30W)
- 1 x Photo Tent w/ Color Backgrounds: 24″
- 2 x Tabletop Light Stands: 18″
- 1 x Magnetic Studio Table: 12 x 12″
Buy the Product Photography Kit Here
If you’re looking to save more money. Try DIY product photography using your smartphone and a bathtub!
Simple Post-Production Effects
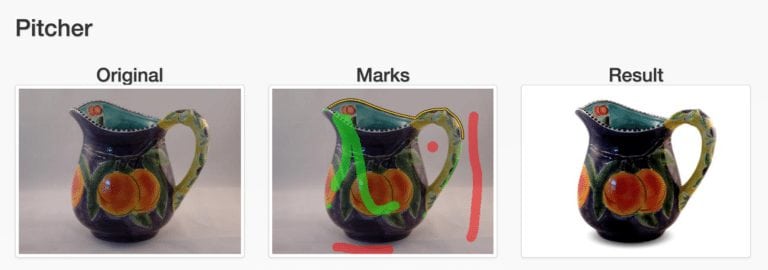
Do you have computer programs like Picasa or Photoshop? These tools can make it easier for you to adjust the images. Simple programs can make your images pop with a pristine white backdrop. The tent and lighting is to make sure that the post production effects give you a bright white finish.
Clippingmagic is featured below!
Note: Tip on Taking Photos of Small Objects
Set up your camera in a way that allows you to shoot from the top down. The light should be from various directions. Having a light table for this purpose can be advantageous. For you background, set up a white (or black) paper.
Amazon Product Photography Services
There are multiple ways to take photos of your products. You can take the DIY route like we mentioned above or you can pay for your photos to be taken by professionals. Either way we want to help you make the best decision possible.
Amazon has thrown their hat in the ring as a product photography service. They started a freelance platform for Amazon sellers to use. Their product photography service is highly rated and seems to get incredible reviews.
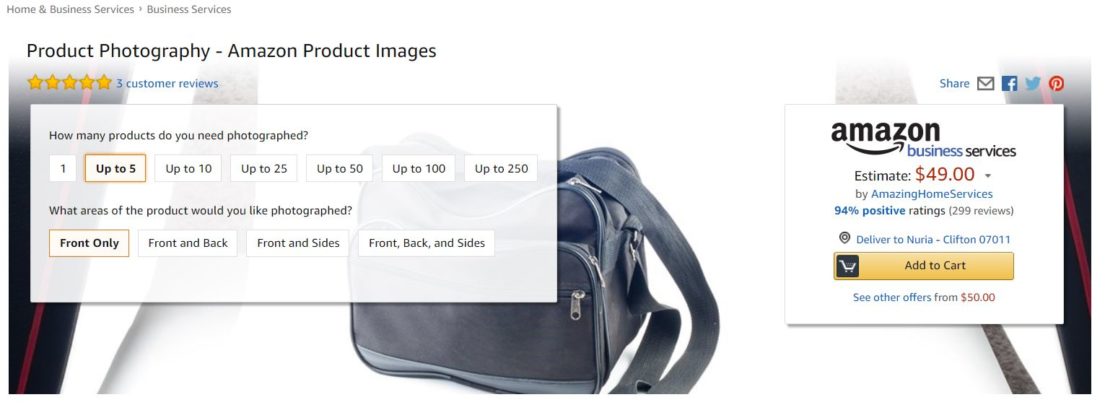
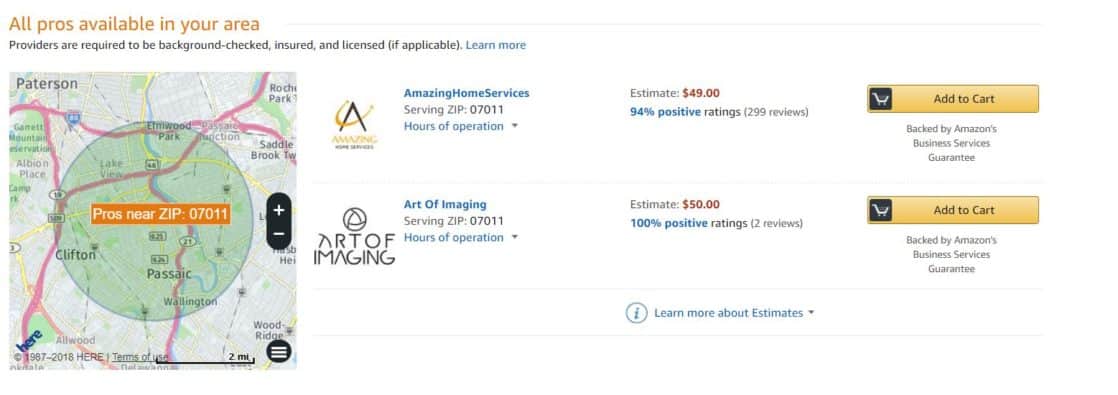
The cool thing about it is that if you want someone local to take your photos then Amazon will match you with a local business to take your product photos. This is a total game changer if you’re a local photographer or a seller looking to save on shipping costs because you don’t need to send your products to a photographer. It’s worth a look!
Our recommendation is Kenji ROI:

These guys are pros and they work with some of the largest Amazon sellers in the business. They’re not just photographers, their entire business is Amazon photography so they stay on top of every major trend.
If you want them to take over your product photography and deliver some Amazing photos then I cannot put you in better hands. They have a special deal for us:
Get $100 Off Your First Kenji ROI Order w/ Promo Code: Startup100
Wrapping This Up…
The idea of DIY product photography is to present your merchandise to your target audience in a way that solves their problems. It doesn’t matter if your doing retail arbitrage , selling on shopify, or anywhere else.
Just look at all the different images available to make your product stand out. Try out every single one of them and I promise you can convert more customers on your product listings.
But remember to keep it simple and relay your message in the cleanest way possible. Discover different angles, explore the close-ups, and work with the background. Take advantage of the natural lighting and use diffused lighting when needed.
Do you have any questions about product photography? Let us know below because we want to hear from you!

I enjoyed this article. It’s worth reading.
The mistake we do often while taking photos is that to focus on the subject of image and lose sight of the entire frame. It’s important to keep eyes to the edges and corners of your photos. Fill the frame with the subject, but paying attention that your subject in the frame is not cut off.
Hey Zubida, thank you for reading the article and reaching out. You’re absolutely right, taking good photos is something that requires a lot of attention to small details. Thanks for the tip!
In eCommerce business it is essential to hire the best photographers and take remarkable photos. Because customer will be making their purchase decision based on photos of the product. so product’s photo should be Perfect. perfect photo can be achieved after perfect post production.
Hey Damian, thanks for reaching out. You’re absolutely right, nothing beats professional photography.
Hey Will! Awesome job with this, very concise and detailed post. Curious to know if you have any insight on 360 product photography in Amazon posts as of yet? We have started seeing this pop up in some Vendor Central listings as of recent. Also highlighted on this page (which includes links to Amazon listings with 360 product photography): https://www.iconasys.com/applications/amazon-product-photography/
Hi Mike. Thanks for bringing this to my attention. I didn’t even know this existed. There’s an article about it here https://amzadvisers.com/360-spin-images-amazon-listings/ but I’m curious about Will’s take on it. Can this be useful for customers if you have small items like kitchen/bathroom cleaning tools?
Great write up @Gorilla ROI! Yes, we are still trying to get more info on this as well! For ex. how many frames/360 product view they require?Do we just upload an image set, and they do the 360 composition? Any info anyone can provide would be very useful!
We’ve named our main images “AmazonASIN.jpeg”. Will it make sense to name all images under a product ex: “AmazonASIN_1.jpeg” etc.? Or does the tip only apply to the main image?
Thanks for some great articles. They are really helpful to a newbie.
Hey Henriette, thanks for reaching out 🙂 You would be absolutely correct in thinking you should name all your images with an appropriate title! Maybe I should update the post to reflect that. With Amazon you want to give them as much accurate information as possible which includes proper naming of all your images. So glad you liked the article. Please let us know if you have any more questions.
Thanks for including our product image.
Very intuitive article Erick
With your product photography tips, enhancing a Brand Content improves the CTR and drive sales to the product. Enhanced brand Content is quite the trend amongst most Amazon US sellers. Optimizing the 7 photos, which is ideal enough for any product page, with visually appealing images and a good background results in higher rank during Amazon product search.
Cheers for this Erick,
Having great photos is incredibly important in ecommerce. But it’s also a big pain point for people getting started, because it’s not cheap! I’m sure a lot of people will use this guide and save some $$$ by doing it themselves. When you get a few sales under your belt, you can think about bringing in the professionals!
Thanks again!
Thanks for the article Erik. Photos are definitely a critical part of an Amazon listing. I used one of the small tents but found that I liked the results better if I took the photos outdoors in natural lighting on a cloudy day with no harsh sun or shadows. I would send my photos to a guy on Fiverr for background removal because he did better than I could do in Photoshop.