Mastering Your Amazon Seller Account: An Introduction
Navigating e-commerce can be daunting. But if you’re looking to dive into selling products online, having an Amazon seller account is a great start. Here’s what you need to know right away:
- What is it? An Amazon seller account allows you to sell products directly on Amazon.
- Who can use it? Both individual and professional sellers.
- Why use it? Access to Amazon’s vast customer base and powerful selling tools.
- How to get started? Sign up, choose a plan, and list your products.
In today’s digital marketplace, the importance of creating and optimizing an Amazon seller account cannot be overstated. It’s your gateway to reaching millions of potential customers each day.
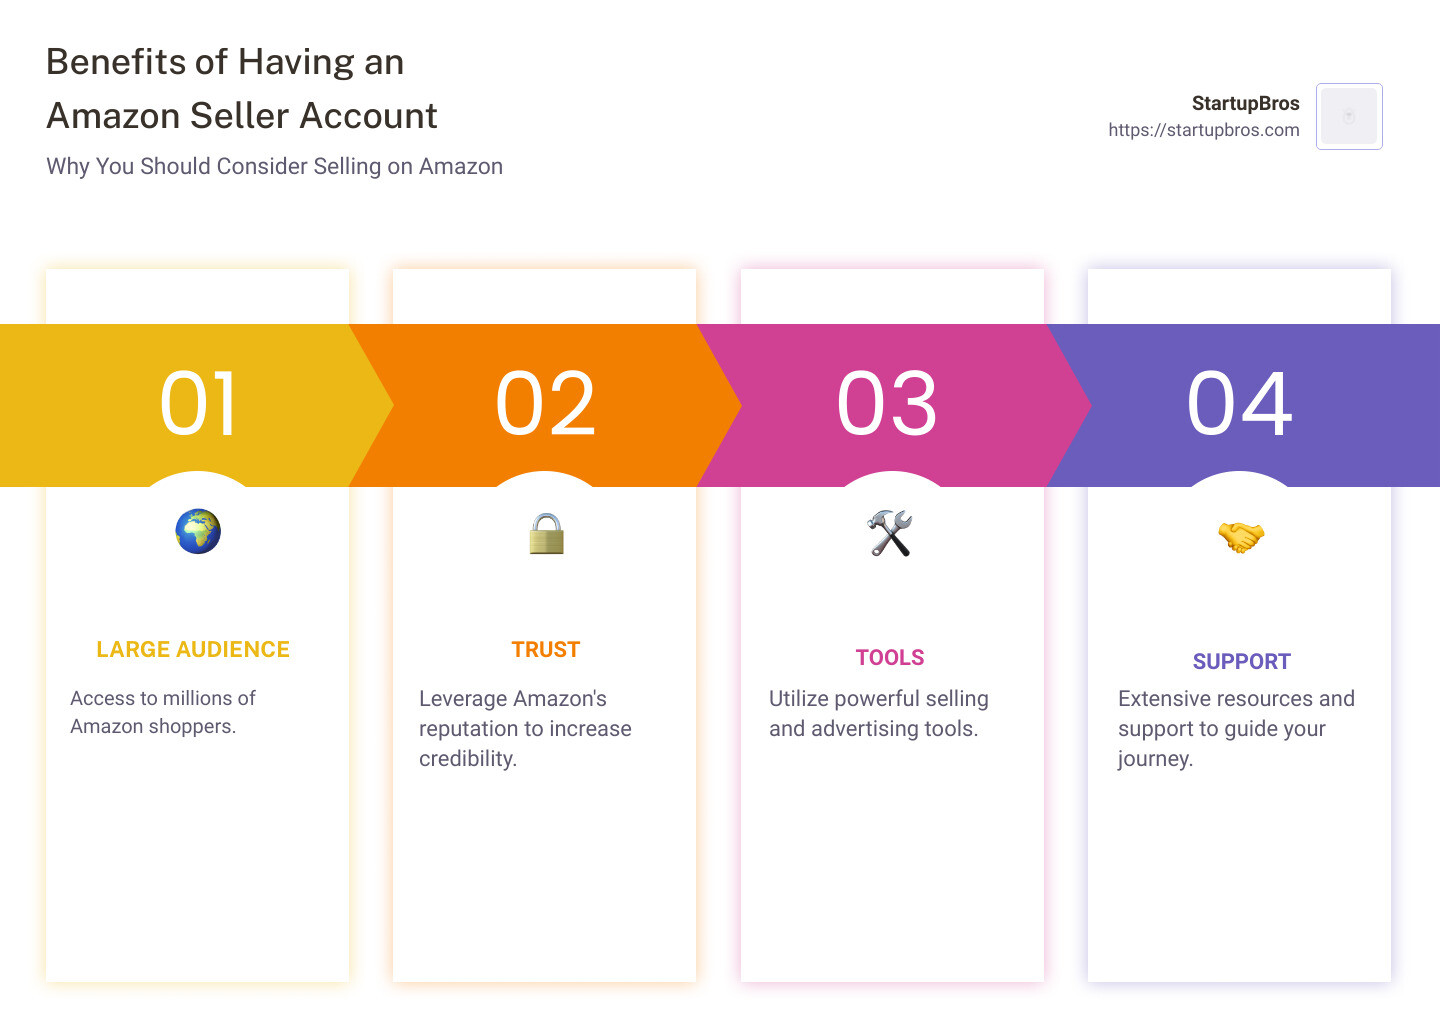
Benefits of having an Amazon seller account include:
– Large Audience: Access to millions of Amazon shoppers.
– Trust: Amazon’s reputation can help increase your product credibility.
– Tools: Powerful selling and advertising tools to enhance business growth.
– Support: Extensive resources and support from Amazon to guide your journey.
Starting with an Amazon seller account opens numerous opportunities for your business. You’ll tap into a well-established customer base, which can substantially boost your sales. Plus, with the variety of tools and resources available, managing your account and optimizing product listings becomes seamless.
I’m Will Mitchell. With over 20 years of experience in importing from China and selling products online, I’ve helped thousands of entrepreneurs navigate Amazon seller accounts. My expertise includes managing e-commerce businesses, consulting for Fortune 500 companies, and leading successful group sourcing events.
Next, let’s dive into how to get your Amazon seller account up and running.
Setting Up Your Amazon Seller Account
Choosing the Right Selling Plan
When setting up your Amazon seller account, the first big decision is choosing the right selling plan. Amazon offers two plans: Individual and Professional.
-
Individual Plan: This plan costs $0.99 per sale. It’s best for those who are just starting out or plan to sell fewer than 40 items per month. No monthly subscription fee, but you pay per item sold.
-
Professional Plan: This plan costs $39.99 per month, regardless of how many items you sell. It’s ideal for those who plan to sell more than 40 items per month and want access to advanced selling tools and reports.
Pro Tip: If you’re unsure which plan to start with, go for the Individual Plan. You can always upgrade to the Professional Plan as your business grows.
Navigating Amazon Seller Central
Once you’ve chosen your plan, you’ll need to navigate Amazon Seller Central—your hub for managing your Amazon business.
Sign-Up Process
- Go to Seller Central: Visit sell.amazon.com and click “Sign Up”.
- Enter Personal Information: You’ll need:
- A valid government-issued ID or passport
- A recent bank account or credit card statement
- A chargeable credit card
- Your phone number
- Verification: Amazon will verify your information. This may include a phone call or a text message to confirm your identity.
Required Information
To complete your registration, have the following ready:
- Bank Account and Routing Number: For receiving payments.
- Internationally Chargeable Credit Card: For billing purposes.
- Government-issued ID: Passport or driver’s license.
- Tax Information: Your tax ID or Social Security number.
- Phone Number: For verification purposes.
Navigating the Dashboard
Once your account is set up, you’ll have access to the Seller Central dashboard. Here’s a quick overview of key tools and features:
- Manage Inventory: View and adjust your product listings.
- Automate Pricing: Set dynamic pricing rules.
- Manage Orders: Track and fulfill customer orders.
- Feedback Manager: Monitor customer reviews and ratings.
- Sales Dashboard: Track visits to product detail pages and sales data.
- Payments Dashboard: Understand your sales, expenses, and refunds.
- Account Health: Monitor your customer service, shipping performance, and policy compliance.
Pro Tip: Use the Amazon Seller app for managing your business on the go. It’s packed with features to help you stay on top of your operations from anywhere.
With your Amazon seller account set up and your dashboard configured, you’re ready to start listing your products. Next, we’ll dive into how to create and optimize your product listings for maximum visibility and sales.
Listing Your Products
Optimizing Product Listings
Creating and optimizing your product listings is key to success on Amazon. Here’s how to do it right.
Product Listings
First, you need to create product listings. If your product is already on Amazon, you can match your offer to the existing product detail page using the GTIN (Global Trade Item Number) or ASIN (Amazon Standard Identification Number). If it’s not, you’ll need to create a new product detail page.
Bulk Listings
If you’re a Professional seller, you can list products in bulk. This saves time and helps manage large inventories efficiently. Use Amazon’s bulk listing tools to upload multiple products at once.
Product Detail Pages
Your product detail page is where customers learn about your item. It includes the title, features, images, and description. Think of it as your product’s resume – it needs to be detailed, accurate, and appealing.
Keywords
Keywords are crucial for getting your product seen. Use tools like Google Keyword Planner or Amazon’s own keyword research tools to find the best terms. Place these keywords in your title, bullet points, and description to improve search visibility.
Descriptions
Your product description should be clear and informative. Mention the key features and benefits of your product. Use bullet points to make it easy to read. For example:
- High-quality material: Durable and long-lasting.
- User-friendly design: Easy to use for everyone.
- Affordable price: Great value for money.
Neil Patel suggests writing your own descriptions to keep them original and engaging. Re-state key features to reinforce your message.
Images
Images are critical. Amazon requires your main image to have a plain white background and take up 85% of the space. Use high-quality images (at least 1000px by 500px) to ensure they are zoomable. You can add up to nine pictures, so show your product from different angles and in use.
Pro Tip: Include infographics to highlight your product’s benefits visually.
Optimizing your product listings is essential for attracting customers and driving sales. Next, we’ll look at effective pricing strategies to stay competitive in the Amazon marketplace.
Pricing Strategies
Using Pricing Tools
Pricing your products competitively on Amazon can make or break your success. There are several strategies and tools you can use to ensure your prices are optimized.
Static Pricing
Static pricing means setting a fixed price for your product. This approach is straightforward and easy to manage but may not always keep you competitive. To set static prices:
- Research Competitors: Look at what others are charging for similar products.
- Factor in Costs: Include production, shipping, and Amazon fees.
- Set Your Price: Ensure it’s attractive yet profitable.
Dynamic Pricing
Dynamic pricing adjusts your product prices based on various factors like demand, competition, and market conditions. This method helps you stay competitive but requires more management. Dynamic pricing tools can:
- Monitor Competitor Prices: Automatically adjust your prices based on competitors.
- Respond to Market Changes: Increase prices during high demand and lower them when demand drops.
Competitive Pricing
A competitive price is one that balances being attractive to customers while still generating profit. Amazon provides data on:
- Competitive External Price: The lowest price for an item from major retailers outside Amazon.
- Lowest Amazon Price: The lowest price currently offered by a seller in the Amazon store.
To be the Featured Offer (the offer a customer often sees near the top with ‘Buy Now’ and ‘Add to Cart’ buttons), you must have a competitive price and a Professional selling plan.
Automate Pricing
Automating your pricing can save you time and help you stay on top of market changes. Amazon’s Automate Pricing Tool allows you to set rules to adjust your prices automatically. You can:
- Match Lowest Price: Automatically match or beat the lowest price.
- Set Minimum and Maximum Prices: Ensure you never go too low or too high.
Pricing Rules
Using pricing rules, you can create specific conditions for when and how your prices should change. For example, you can set a rule to:
- Lower Prices During Sales Events: Automatically adjust prices during Black Friday or Cyber Monday.
- Increase Prices When Stock is Low: Maintain profitability when inventory is scarce.
Mastering these pricing strategies and tools can help you stay competitive and maximize your profits on Amazon. Next, let’s explore the different options for fulfilling customer orders.
Fulfilling Orders
Fulfillment by Amazon (FBA)
When it comes to fulfilling orders, Amazon offers two main options: Fulfilled by Merchant (FBM) and Fulfilled by Amazon (FBA). While both have their merits, FBA is often the go-to choice for many sellers due to its numerous benefits.
Fulfillment Options
- Fulfilled by Merchant (FBM): You handle all aspects of storage, packaging, and shipping.
- Fulfilled by Amazon (FBA): Amazon takes care of storage, packaging, shipping, and even customer service.
Shipping Settings
For FBM, you need to configure your own shipping settings. This includes:
- Shipping Rates: Set rates based on regions or shipping methods.
- Shipping Times: Define how long it will take to ship your products.
- Carrier Options: Choose which carriers you will use for delivery.
For FBA, Amazon handles all shipping logistics. They ensure fast delivery, including options for Prime two-day shipping.
Return Settings
Managing returns is crucial for customer satisfaction. With FBM, you must:
- Set Return Policies: Define how returns are handled.
- Process Returns: Manage the logistics of receiving and inspecting returned items.
With FBA, Amazon processes returns on your behalf, including customer service and refunds, making it hassle-free for you.
FBA Benefits
- Prime Eligibility: Products are eligible for Amazon Prime, attracting more customers.
- Storage Solutions: Amazon stores your products in their warehouses.
- Customer Service: Amazon handles customer inquiries and returns.
- Fast Shipping: Amazon ensures quick delivery, boosting customer satisfaction.
Sending Inventory
To start with FBA, you need to send your inventory to Amazon’s fulfillment centers. Here’s how:
- Create a Shipping Plan: In Seller Central, go to “Inventory” and select “Send/Replenish Inventory.”
- Label Products: Print and attach labels to your products. Amazon provides these labels.
- Ship to Amazon: Use Amazon’s partnered carriers or your own shipping service to send products to the designated fulfillment center.
Managing FBA Products
Once your inventory is in Amazon’s hands, you can monitor and manage it through Seller Central:
- Inventory Levels: Keep track of stock levels to avoid running out.
- Sales Performance: Use the dashboard to monitor sales trends and performance.
- Replenishment Alerts: Set alerts to notify you when stock is low.
- Customer Feedback: Monitor reviews and feedback to maintain product quality and customer satisfaction.
By leveraging FBA, you can focus more on growing your business while Amazon handles the logistics. Next, let’s dive into how to analyze and optimize your performance on Amazon.
Analyzing and Optimizing Performance
Using Seller Central Tools
Monitoring your performance is key to success on Amazon. Seller Central offers a suite of tools to help you stay on top of your game.
Sales Tracking
Tracking your sales is crucial. The Sales Dashboard in Seller Central gives you a clear view of your sales, orders, and revenue. You can:
- View Sales Trends: See daily, weekly, and monthly sales trends.
- Compare Performance: Analyze your sales performance over different periods.
- Identify Best Sellers: Quickly spot which products are performing well.
Customer Feedback
Customer feedback is gold. It helps you understand what you’re doing right and where you can improve. In Seller Central, you can:
- Read Reviews: Monitor product reviews to gauge customer satisfaction.
- Respond to Feedback: Address customer concerns directly to improve your ratings.
- Track Seller Feedback: Keep an eye on your overall seller rating.
Performance Metrics
Amazon uses several metrics to evaluate your performance. These include:
- Order Defect Rate (ODR): Aim to keep this below 1%. It includes negative feedback, A-to-Z claims, and chargebacks.
- Late Shipment Rate (LSR): Should be under 4%. This measures how often you ship orders late.
- Pre-fulfillment Cancel Rate (CR): Keep this below 2.5%. It tracks orders you cancel before shipping.
- Valid Tracking Rate (VTR): Aim for above 95%. This ensures customers can track their orders.
Payments Dashboard
The Payments Dashboard helps you manage your finances. You can:
- View Sales Proceeds: See how much you’ve earned from sales.
- Track Expenses: Monitor your costs, including Amazon fees and shipping costs.
- Check Disbursements: See when and how much Amazon transfers to your bank account.
Account Health
Your Account Health is vital. Amazon provides an Account Health Dashboard to help you stay compliant with their policies. It covers:
- Policy Compliance: Make sure you adhere to Amazon’s rules.
- Customer Service Performance: Keep your Order Defect Rate low.
- Shipping Performance: Maintain good shipping metrics.
Using Seller Central Tools
All these tools are designed to help you optimize your performance. By regularly checking your sales, customer feedback, and performance metrics, you can make informed decisions to grow your business.
Next, we’ll explore how to promote and advertise your products effectively on Amazon.
Promoting and Advertising Your Products
Amazon Ads
Promoting and advertising your products on Amazon is key to driving sales and getting noticed. Amazon offers various advertising tools to help you achieve this. Here’s a breakdown of what you can use:
Advertising Tools
1. Sponsored Products
Sponsored Products are ads that showcase individual products. They appear in search results and on product detail pages. These ads are pay-per-click (PPC), meaning you only pay when someone clicks on your ad.
2. Sponsored Brands
Sponsored Brands allow you to feature your brand logo, a custom headline, and up to three of your products. These ads appear at the top of search results, helping to boost brand visibility. You need to be brand registered to use this feature.
3. Sponsored Display
Sponsored Display ads help you reach customers both on and off Amazon. These ads target shoppers who have viewed your product or similar products in the past 30 days. This can help bring them back to your listing.
Promotions and Discounts
Amazon offers several ways to create promotions and discounts to attract customers:
- Coupons: Create coupons that appear on the Amazon Coupons page, in search results, and on product detail pages. These are a great way to draw attention.
- Percentage-Off and BOGO Promotions: Offer discounts like “buy one, get one free” or percentage-off deals. These appear as part of a Featured Offer.
- Lightning and 7-Day Deals: These time-limited deals appear on the Amazon Deals page and are popular during events like Prime Day.
CPC Campaigns (Cost-Per-Click)
Cost-Per-Click (CPC) campaigns are a core part of Amazon advertising. You set a bid for how much you’re willing to pay for a click on your ad. The higher your bid, the more likely your ad will be shown to shoppers. CPC campaigns are used in all the ad types mentioned above.
Using Amazon Ads Effectively
A well-planned advertising strategy can significantly boost your sales. For example, in one case study, the party game “Awkward” achieved an 8% increase in sales by tailoring keywords for holidays and increasing bids to stay competitive.
To get the most out of your ads:
– Do proper keyword research: Use tools like Keyword Scout to find the best keywords for your products.
– Monitor and adjust: Keep an eye on your campaigns and adjust bids and keywords as needed.
– Test different ad types: Try Sponsored Products, Sponsored Brands, and Sponsored Display to see what works best for your products.
By using these advertising tools and strategies, you can effectively promote your products and grow your Amazon business. Next, we’ll answer some frequently asked questions about Amazon seller accounts.
Frequently Asked Questions about Amazon Seller Accounts
Is an Amazon seller account free?
No, an Amazon seller account is not entirely free. You have two main options for selling plans:
- Individual Plan: This costs $0.99 per item sold. It’s ideal if you plan to sell fewer than 40 items per month.
- Professional Plan: This costs $39.99 per month, no matter how many items you sell.
In addition to these fees, you will also incur referral fees on each item sold and other potential costs like fulfillment fees if you use Amazon’s FBA program.
How much is a seller’s account on Amazon?
The cost of an Amazon seller account depends on the selling plan you choose:
- Individual Plan: $0.99 per sale.
- Professional Plan: $39.99 per month.
That these are just the basic costs. You may also encounter other fees such as:
- Referral Fees: Typically 15% of the sale price, but it varies by category.
- Fulfillment Fees: If you use Fulfillment by Amazon (FBA), there are additional shipping and handling costs.
- Advertising Costs: If you use Amazon Ads to promote your products.
Is it hard to get approved for an Amazon seller account?
Getting approved for an Amazon seller account is generally straightforward, but there are a few steps to complete:
- Sign-Up Process: Go to Amazon Seller Central and click on “Register now.”
- Required Information: You’ll need to provide details like your business name, address, phone number, bank account, and credit card information.
- Identity Verification: Amazon will ask you to upload images of your ID and a bank statement. You will also need to complete an identity verification via video call with an Amazon associate.
Once you’ve completed these steps, your account will usually be approved quickly. However, make sure all your information is accurate to avoid delays.
By addressing these common questions, we hope to make the process of setting up an Amazon seller account clearer for you. Next, we’ll dive into listing your products effectively on Amazon.
Conclusion
Congratulations! You’ve taken the first steps to becoming an Amazon seller. By now, you should have a good understanding of how to set up your Amazon seller account, choose the right selling plan, and navigate Seller Central.
To recap, setting up your Amazon seller account involves selecting a selling plan, providing necessary information, and completing verification steps. Once your account is approved, you can start listing your products and optimizing your listings for better visibility and sales.
Why Choose StartupBros?
At StartupBros, we understand that diving into Amazon selling can be daunting. That’s why we offer comprehensive resources and support to help you succeed. Whether you’re looking for detailed guides, expert advice, or community support, we’ve got you covered.
Explore our products and services to find out how we can help you master Amazon FBA and scale your business.
Next Steps
-
List Your Products: Start adding your products to your Amazon store. Make sure each listing is optimized with relevant keywords, clear descriptions, and high-quality images.
-
Set Competitive Prices: Use pricing strategies and tools to ensure your products are competitively priced.
-
Fulfill Orders Efficiently: Choose the right fulfillment option, whether it’s Fulfillment by Amazon (FBA) or Merchant Fulfilled Network (MFN), to ensure timely delivery and customer satisfaction. Learn more about signing up for FBA to get started.
-
Promote and Advertise: Utilize Amazon’s advertising tools to promote your products and reach more customers.
-
Monitor Performance: Use Seller Central’s tools to track your sales, manage customer feedback, and monitor your account health.
-
Join the Community: Engage with other sellers in forums and communities to share tips, ask questions, and stay updated on the latest trends.
By following these steps, you’ll be well on your way to building a successful Amazon business. Consistency and continuous learning are key.
We’re excited to see you thrive in your Amazon selling journey. If you need more guidance or resources, don’t hesitate to reach out to us at StartupBros.
Happy selling!
Ready to take your Amazon business to the next level? Check out our services to get expert support and resources tailored to your needs.